I am most certainly a large newbie when it comes to models; when it comes to experience I have made only few models at a children ability camp, called talent factory, where you can choose to sew or make radios and the like. I choose models and made a plane of some sort and then a horribly painted Apache Helicopter.
I, however, recently painted a set of Wright Brothers with their first aircraft that took flight in Kitty bay, which I enjoyed more than I thought I would. I have never experienced this feeling of creation when painting a portrait of a person.
The act rekindled my feelings about doing so and, as such, I am creating a newbie guide to painting quality figures.
I will go step by step with all of my mistakes and blunders, so that the future generations of figure lovers can laugh at them.
First I am starting with the tools I have purchased to evaluate their actual benefit piece by piece. I will number each of them so that in the end I can make the correct decisions about them and you can look for the answers with the 'find' tool on your browser, which should be Firefox.
1. Mr. Color Paints x10
Cost: Generally $3 each w/ shipping

2. Finishing Abrasives x2 [each different quality)
Cost: Generally $3 each w/ shipping

3. TG138 Air Brush 0.8mm (Crappy Cheap Airbrush or CCA)
Cost: About $20 w/ shipping

4. Tamiya Epoxy Putty
Cost: $5 w/ shipping

5. Brushes x3 (2 deatil and one flat)
cost: About $2 each w/ shipping

6. My first kit
Cost: Hard to account, due to joy, excitement, bonus credit with the site, and epic Lance of Longinus.


Rei is definitely one of the most iconic anime characters of all time. She has always been a favorite of mine and one of the only characters that it actually makes sense to have more than one of. This will be my second figure of her, but my first paint job.
10/17/2010 Day 2

Ok, so instead of destroying my figure at my first resin attempt, I have decided to begin with a duplicate figure I have.
Her name is Momo.
...or should I say was Momo.
Anyway I feel that I need some practice as my modeling skills are way out of date. I will begin by washing my duplicate Momo.
I found that pouring detergent on her was the most effective way to remove oil and dust and definitely recommend this for all those repaint fans out there. I had no alternate motives, none what-so-ever.
(video looks better not full-screened, because of low quality)
This was hard to film with a little camera....I need better equipment, but anyway...
The only reason I did this was because I intended to repaint the entire body as a Keirhwasher and thus, its whole must be cleansed.
Kirschwassers look like this and are Momo's "sisters." They also have many forms as you can also see Momo's old form here. This new Momo will become an original version of Kirschwasser because they never adapted her v2 style dress.

After her shower I set her in her bath to get clean. I also used a toothbrush for those hard to reach places.

I used more All detergent to do this and mixed it with a little water.

I dryed her off after rinsing her in hot water and being careful NOT TO LET PARTS GO DOWN THE SINK, which would be horrible, with some paper towels.

"o I'll just cut these 14 gage wires out with my craft scissors! :D"

FAIL! T^T
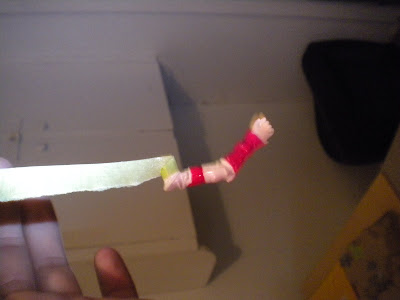
This is not something that you want to do. The problem here is that the wire is way to big. get a small maliable wire that you can easily wrap around your figure's parts for painting. I am going to have to buy some smaller gage wire for this, but for now I just have to use tape to wrap around the parts for painting.

Next is to prime the parts that you attach the wires, or tape, to. Would not recommend tape because is flails around crazily.

In the end I got her primed and had to hang up the two parts that my wire was to big to wrap around. >.<

I poked holes in a cardboard box to let the peices dry, but it kept falling through, so I taped some wires on the box. I would recommend some hard foam or something instead.
